Your Gmail password is the master key to almost everything you own online. Banking, social media, taxes, ride-share apps, shopping accounts: most of them send password-reset emails to your Gmail. If someone gets into your Gmail, they own your digital life. Two-factor authentication closes that door. Setup takes about five minutes.
Google calls it 2-Step Verification. Most of the security world calls it 2FA. Same thing. This guide walks through enabling it, picking which of the four methods to use, generating backup codes (the step everyone skips) and planning for what happens when your phone falls in a river.
Turn it on in five minutes
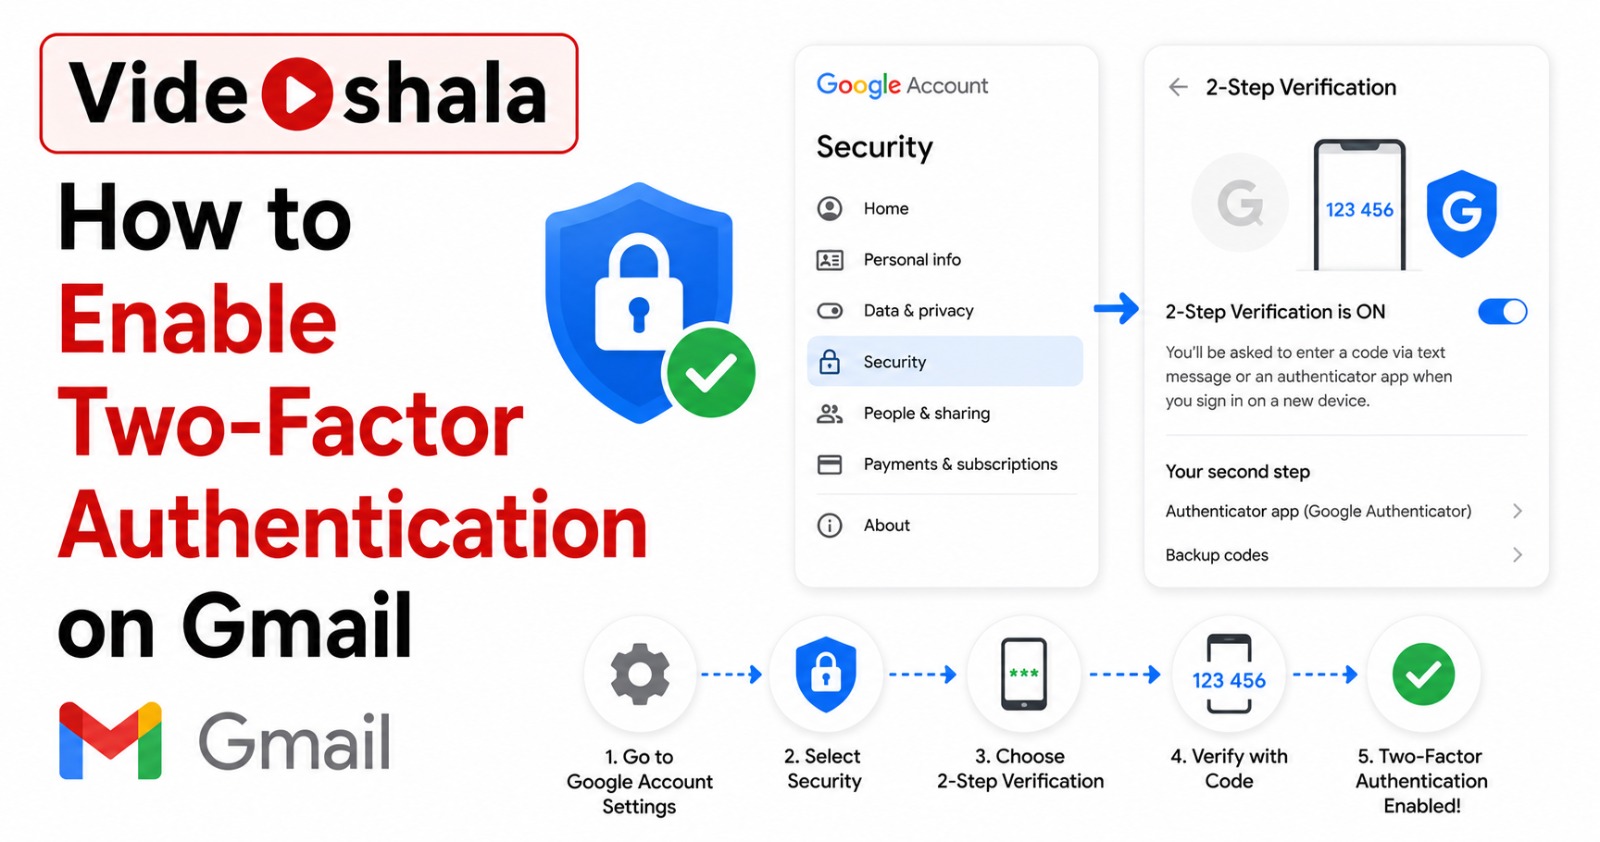
- Open myaccount.google.com in a browser. Sign in if needed.
- Click Security in the left sidebar.
- Under "How you sign in to Google", click 2-Step Verification.
- Click Get started. Google asks for your password to confirm it is you.
- Google suggests setting up Google prompts first (the easiest method). Pick the phone you want to receive prompts on, then click Continue.
- Add a backup phone number for SMS codes (used if prompts fail). Pick the country, enter the number, choose Text or Call, click Send.
- Enter the verification code you receive. Click Next.
- Click Turn on to enable 2FA.
2FA is now on. The next time you sign in from a new device, Google will ask for the second factor.
The four 2FA methods, ranked honestly
Google supports four second-factor methods. They are not equally secure. Pick based on your threat model, not what Google's setup wizard pushes first.
| Method | Honest take |
|---|---|
| Security key or passkey | Strongest. Phishing-resistant because the key only signs requests from the real Google domain. Hardware keys cost roughly Rs 1500-4000. Passkeys are free and stored on your phone or laptop. |
| Google prompts | Strong and easy. Push notification to your phone, tap Yes. Works on Android (built in) and iPhone (needs Gmail or Google app installed). Recommended default for most users. |
| Authenticator app | Strong and works offline. Generates 6-digit codes every 30 seconds. Use Google Authenticator, Authy or 1Password. The only method that works without internet or cell service. |
| SMS codes or voice call | Weakest. Vulnerable to SIM-swap attacks where an attacker convinces your carrier to port your number. Avoid as the primary method, fine as a backup. |
Why SMS is the weakest method
SIM-swap fraud has become common in India and globally. The attacker calls your mobile operator, claims your SIM is lost and asks for a replacement. If the operator's identity check is weak, the new SIM is issued with your number. The attacker now receives all your SMS, including 2FA codes. By the time you notice your phone has no signal, the damage is done. This is not theoretical. Cases have been reported in RBI consumer alerts for several years now.
Set up the Authenticator app (recommended addition)
Even with Google prompts as your primary, set up the Authenticator app as a second option. It works when you have no internet, no cell service or your phone refuses to receive push notifications.
- Install Google Authenticator from the App Store or Play Store.
- Back in myaccount.google.com, go to Security, then 2-Step Verification.
- Scroll to Authenticator app and click Set up.
- Google shows a QR code. In the Authenticator app, tap the plus icon, pick Scan a QR code and scan it.
- The app shows a 6-digit code that changes every 30 seconds.
- Enter the current code on the Google setup page. Click Verify.
Done. From now on, the Authenticator app generates fresh codes on demand. Authy and 1Password also work with the same QR code if you prefer those.
Generate backup codes (do this now)
Backup codes are 10 one-time-use codes that work in place of any other 2FA method. They are the difference between "lost my phone, will fix this in 5 minutes" and "lost my phone, locked out of my email for 3 weeks".
- On the 2-Step Verification page, scroll to Backup codes.
- Click Set up or Show codes.
- Google generates 10 codes, each 8 digits long.
- Click Download or Print.
- Store the codes somewhere physical. Print them, fold them, put them in your wallet, drawer or document file. Do NOT email them to yourself, do NOT save them in Google Drive, do NOT screenshot them into Photos. All three of those are inside the Google account they are supposed to rescue.
Each code works once. Use one and it strikes through on the list. When you have used 8 of 10, generate a new set: the old set becomes invalid automatically.
Add a security key for the highest protection
Hardware security keys are physical USB or NFC devices (YubiKey is the most well-known brand). When you sign in, you tap the key. The key signs a challenge with a private cryptographic key that never leaves the device. This is phishing-resistant: even if you click a fake Google sign-in page, the key refuses to authenticate because the domain does not match.
If you handle sensitive work (journalism, activism, crypto holdings, executive accounts), enrol in Google's Advanced Protection Program, which requires two security keys and disables less-secure 2FA methods entirely.
Passkeys: the long-term path
Passkeys are a 2023-2024 addition that replace both the password and the 2FA prompt with a single biometric or screen-lock unlock on your device. When you sign in with a passkey, Google skips 2FA because the passkey already proves you control the device.
To add a passkey:
- Open g.co/passkeys.
- Click Use passkeys.
- Pick a device (your phone is usually the easiest). Authenticate with the device's screen lock or biometric.
- Google creates a passkey linked to that device.
Keep 2FA enabled alongside passkeys. The passkey is your primary, the 2FA codes are your fallback for when you sign in with the password instead (such as on a public computer).
After enabling 2FA: update your desktop email clients
Turning on 2FA breaks Outlook, Thunderbird and Apple Mail because those apps cannot complete the 2FA challenge. To fix them, generate an app password (a 16-character bypass code specific to one app).
Our guide on generating a Gmail and Google Workspace app password walks through the steps. Generate one app password per device that connects to Gmail via IMAP or SMTP. If a device is ever lost or stolen, revoke that specific app password without disabling 2FA across the rest of your setup.
Common problems and quick fixes
| Problem | Fix |
|---|---|
| Google prompts never arrive on my phone | Check the Gmail or Google app is installed and signed in on the right phone. Check internet connectivity. As a fallback, switch to Authenticator codes, which work offline. |
| I got a new phone and lost my Authenticator codes | If you used a backup code, sign in and re-enrol Authenticator. If you have no backup codes, use account recovery at accounts.google.com/recovery. Expect a delay. |
| SMS codes are not delivering | Try the voice-call option in the same setup. Then switch to Authenticator codes as your primary so SMS reliability stops mattering. |
| Outlook stopped syncing after I enabled 2FA | Expected. Generate an app password for Outlook and paste it as the Gmail password in the account settings. |
| "This setting is controlled by your administrator" | You are on a Google Workspace account and your admin has set 2FA policy globally. Contact your admin to change enforcement or method requirements. |
The fastest 2FA setup for most people
If you want the quick recipe: enable 2FA with Google prompts as the primary, add Authenticator as a second method, generate 10 backup codes and store them in your wallet. That covers 99% of scenarios. Add a hardware key only if you have a specific reason (sensitive job, crypto holdings, history of being targeted).
The total time investment is about 10 minutes. The downside if you skip it is your email being taken over, your bank accounts compromised through password resets and weeks of recovery work. Worth it.
If you have already enabled 2FA and are now running into desktop email client issues, our app password tutorial handles the fix. And if you are auditing your overall Gmail security, our guide on setting up email forwarding in Gmail includes a note about the yellow forwarding banner that often signals account compromise.