Setting up Gmail forwarding takes about two minutes if you know where to click. The trap is the verification step. Most "Gmail forwarding not working" complaints I see come down to someone never clicking the verification email Google sends to the destination address.
There are three different levels of forwarding in Gmail. Blanket forwarding sends every incoming email to one other address. Filter-based forwarding routes only emails that match your rules. Workspace admin forwarding is for organisations that need to redirect mail across multiple users. This guide walks through all three, plus the verification trap, the daily limit and what to do when forwarding silently stops working.
Which level of forwarding do you need?
| Method | Use it when |
|---|---|
| Blanket forwarding | You want every incoming email sent to one other address. Easy on, easy off. Personal use. |
| Filter-based forwarding | You only want certain emails forwarded (one sender, one subject keyword, mail with attachments etc.). |
| Multiple-address forwarding | You need different emails to go to different people. Set up a filter per destination address. |
| Workspace admin routing | You manage a Google Workspace domain and need to redirect mail for entire users or organisational units. |
Set up blanket forwarding
The most common case. Every email that lands in your Gmail inbox gets a copy sent to another address.
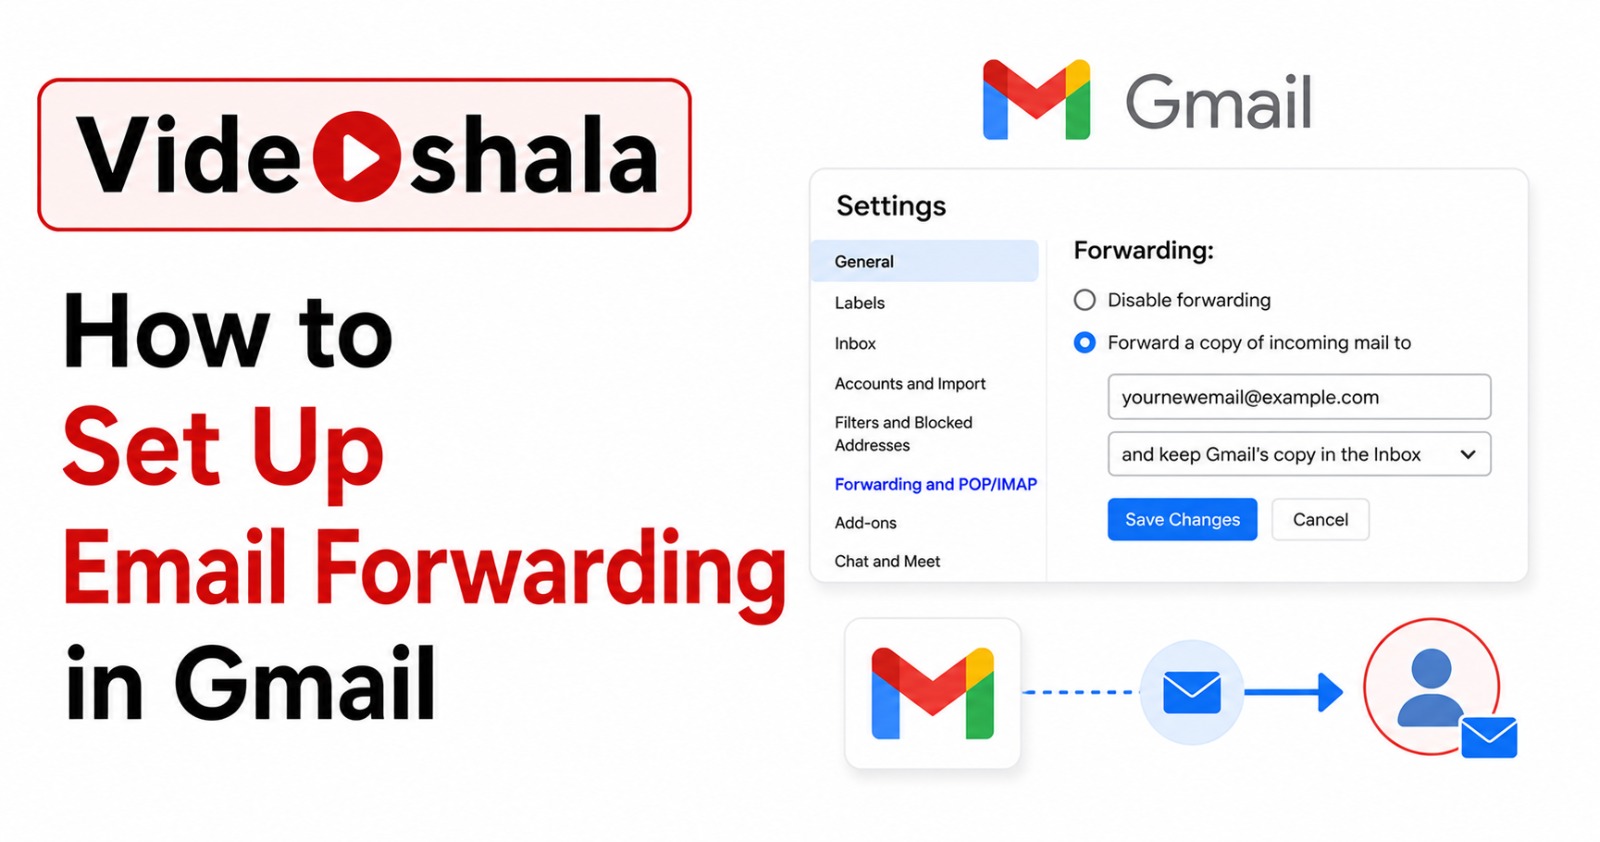
- Open Gmail in a desktop browser. The mobile app cannot do this.
- Click the gear icon at the top right, then See all settings.
- Click the Forwarding and POP/IMAP tab.
- In the Forwarding section, click Add a forwarding address.
- Enter the destination email address. Click Next, then Proceed, then OK.
- Gmail sends a verification email to the destination address. Stop here and go check that inbox.
- In the destination inbox, find the email from forwarding-noreply@google.com and click the verification link inside.
- Return to Gmail Settings, refresh the page and click the Forwarding and POP/IMAP tab again.
- Select Forward a copy of incoming mail to and pick your now-verified address from the dropdown.
- Choose what happens to the Gmail copy: keep in Inbox (recommended), mark as read, archive or delete.
- Click Save Changes at the bottom of the page.
Forwarding starts immediately for new mail. Old emails are not retroactively forwarded.
Set up filter-based forwarding
If you only want certain emails forwarded (newsletters from a specific sender, anything with "invoice" in the subject, mail with attachments etc.), use a filter instead of blanket forwarding. You still need to add and verify the destination address first using the steps above.
- In Gmail, click the gear icon and pick See all settings.
- Click the Filters and Blocked Addresses tab.
- Click Create a new filter.
- Fill in the matching conditions. Common patterns:
- From: only forward mail from a specific sender
- Subject: only forward mail with a keyword in the subject
- Has the words: match keywords anywhere in the message
- Has attachment: only forward mail with attachments
- Click Create filter.
- On the next screen, tick Forward it to and pick the verified destination address.
- Optionally tick Also apply filter to matching conversations to forward existing matching emails as well.
- Click Create filter to save.
Filter-based forwarding bypasses the "Forward a copy of incoming mail to" setting entirely. The two can coexist or you can use only filters. If you have blanket forwarding off and three filters on, only emails matching one of those three filters get forwarded.
Forward to multiple addresses
Gmail's main forwarding dropdown only accepts one destination address at a time. To forward to two or three addresses, use one filter per destination.
- Add and verify each destination address first under Forwarding and POP/IMAP > Add a forwarding address. Each one needs its own verification click.
- Create a filter that matches the mail you want forwarded. To match everything, put a single space in the From field. To match by sender, put the sender address.
- On the filter action screen, tick Forward it to and pick the first destination.
- Save the filter.
- Repeat: create another filter with the same matching criteria but a different destination address.
You can have many filters with the same conditions and different destinations. The mail gets forwarded once for each matching filter.
Why this is awkward
Some workflows really do need an email sent to three people at once. Gmail's official answer is "use a Google Group or distribute via filters". For high-volume routing where filters become unmanageable, look at a shared-inbox tool or set up a server-side forwarding rule outside Gmail.
Workspace admin: route mail across users
If you are an admin managing a Google Workspace domain, the admin console has a separate routing feature that can redirect or copy mail across users without each user setting it up themselves. This is documented in Google's Workspace admin routing guide.
- In the Admin console, go to Apps > Google Workspace > Gmail > Routing.
- Pick your top-level organisational unit on the left.
- Scroll to Email forwarding using recipient address map and click Configure.
- Name the rule. Add address mappings: original address on the left, destination on the right.
- Pick whether to apply to all incoming mail, only external mail and whether to also keep delivering to the original recipient.
- Save. Changes can take up to 24 hours to propagate but usually take effect within minutes.
This is the right tool when an employee leaves and you want their mail rerouted to a manager or when restructuring teams. Admin routing also supports bulk mappings up to 5000 addresses per rule.
The daily forwarding limit
Gmail enforces sending limits that include forwarded mail.
| Account type | Approximate forward limit per day |
|---|---|
| Personal Gmail | ~500 emails per day |
| Google Workspace | ~2000 emails per day |
| New Workspace trial | Reduced, can be as low as 500 |
The limit counts everything you send: regular sends, forwards and filter-triggered forwards combined. Hit it and Gmail pauses sending for 24 hours, then resets. For workflows that forward more than this, you need server-side forwarding (such as an MX rule at your mail provider) or a dedicated email-routing tool.
Common problems and quick fixes
| Problem | Fix |
|---|---|
| Forwarding stopped working out of nowhere | You changed your Google password recently. Some security events disable forwarding. Re-check Forwarding and POP/IMAP and confirm the toggle is still on. |
| Verification email never arrives | Check Spam in the destination inbox. Sender is forwarding-noreply@google.com. If still missing, the destination domain may be blocking Google or the address may have a typo. |
| Filter triggers but mail does not forward | The filter forward action requires the destination address to be verified. Edit the filter, re-select the destination from the dropdown, save again. |
| Some emails forward, some do not | Mail caught by Spam or filtered into Promotions/Social tabs is not forwarded. Whitelist the sender or create a filter that overrides the categorisation first. |
| "This setting is controlled by your administrator" | Your Workspace admin has disabled user-level forwarding for the domain. Only the admin can turn it on via the Routing settings above. |
Turning forwarding off
To stop all forwarding:
- Open Gmail Settings, Forwarding and POP/IMAP tab.
- Select Disable forwarding.
- Click Save Changes.
Filter-based forwarding rules survive disabling blanket forwarding. To stop those too, go to the Filters and Blocked Addresses tab, find each filter with a Forward action, click Edit or Delete.
Gmail also shows a yellow banner at the top of your inbox for the first week after forwarding is set up, reminding you it is on. If you see that banner and did not set up forwarding yourself, change your account password immediately and review forwarding settings. Unexpected forwarding rules are a common sign of account compromise.
Related setups worth knowing: if you are forwarding between Gmail and a desktop client like Outlook or Thunderbird, you probably also need an app password for Gmail to let the client connect. And if you ever need to retrieve old mail that got forwarded out, our guide on retrieving old emails in Outlook 365 covers the destination side of that workflow.